Many times site templates are a good solution to store out-of-the-box customisations. These templates can be retrieved under the 'Custom' tab during the site creation process.
You can however create your own custom tabs, be it with a little workaround: after some searching I found out that the site definition on which the site template is based, apparantly defines the name of tab! Here is how you do it...
1. Create a custom site definition to define the category. You can for example copy the Publishing template.
2. In the webtemp file of you site definition provide the FilterCategories parameter on the Configuration tag. Assign it the string you want to appear on the tab:
< Template Name="CUSTOMSITE" ID="1001" >
< Configuration ID="0" Title="Custom Web Site" Hidden="FALSE"
ImageUrl="/_layouts/images/stsprev.png"
Description="Customized site definition for My Team Site"
DisplayCategory="My Site Definitions" FilterCategories="My Custom Site Templates" >
< /Configuration >
< /Template >
3. Install your custom site definition
4. Create a site based on you site definition and customize it.
5. Save your site as template
Your site template will be available on the site creation page under the tab 'My custom site templates'.
A site template is in fact a cab-file with a manifest.xml file in it. In this xml file the site definition ID is stored. Based on this ID the FilterCategories parameter of the site definition is retrieved.
Lookup Fields
Another post on relational data in SharePoint.
The lookup field turns out to be one hell of a powerfull tool! Suppose you want to relate two different list items or documents. For this purpose you need to use the lookup field.
This field internally stores the ID of the related item, but in the drop-down it displays whatever field you want. However, in your CAML queries you can use both values!
To query the display-value, your CAML would look like this:
To perform a query on the ID you just need to specify LookupId='true' in the FieldRef tag:
The lookup field turns out to be one hell of a powerfull tool! Suppose you want to relate two different list items or documents. For this purpose you need to use the lookup field.
This field internally stores the ID of the related item, but in the drop-down it displays whatever field you want. However, in your CAML queries you can use both values!
To query the display-value, your CAML would look like this:
<Query>
<Where>
<Contains>
<FieldRef Name="Event" />
<Value Type="Lookup">Cronos</Value>
</Contains>
</Where>
</Query>
<Where>
<Contains>
<FieldRef Name="Event" />
<Value Type="Lookup">Cronos</Value>
</Contains>
</Where>
</Query>
To perform a query on the ID you just need to specify LookupId='true' in the FieldRef tag:
<Query>

     <Where>

          <Eq>

               <FieldRef Name="Event" LookupId="true"/>

                 <Value Type="Lookup">7</Value>

          </Eq>

     </Where>

</Query>
Labels:
CAML,
Sharepoint
Relational Data in SharePoint
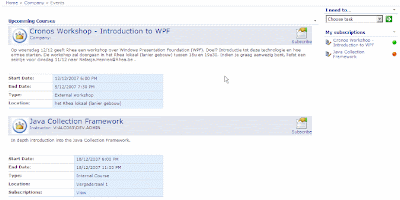
Recently I needed to develop a simple subscription system in a WSS 3.0 environment. My client wanted to have a simple event list on which employees could register (with approval).
One of the fantastic 40 application templates addresses this topic, but as I started thinking about it...I wanted to try to make use of the new possibilities of wss 3.0 concerning multiple content types in a custom list. As it turns out my efforts took me quite far!
Let's start by briefly listing the functional requirements:
Since wss 3.0 it is possible to use multiple content types on one list. So all event types can be joined into one list. To ensure that no event handlers need to be written, we'll need to combine the registration and the event list into one custom list. Again this poses no problem: folders can be used to define a relation between an event and a registration.
So the final idea would be to create some content types for the events that inherit from the folder content type. The registrations for each event are stored in a different content type inside the folder of the event.
We end up with a flexible system! As a event gets deleted, all registrations within the folder are deleted. And no coding needed!
Now we only need to define some views, an approval workflow, use some customized CQWP's to ensure a nice layout and we're all set!

One of the fantastic 40 application templates addresses this topic, but as I started thinking about it...I wanted to try to make use of the new possibilities of wss 3.0 concerning multiple content types in a custom list. As it turns out my efforts took me quite far!
Let's start by briefly listing the functional requirements:
- There needs to be a table/list to store all events. Several different event types exist: internal or external, workshop or course.
- Users can register for internal events, an approval workflow is needed.
Since wss 3.0 it is possible to use multiple content types on one list. So all event types can be joined into one list. To ensure that no event handlers need to be written, we'll need to combine the registration and the event list into one custom list. Again this poses no problem: folders can be used to define a relation between an event and a registration.
So the final idea would be to create some content types for the events that inherit from the folder content type. The registrations for each event are stored in a different content type inside the folder of the event.
We end up with a flexible system! As a event gets deleted, all registrations within the folder are deleted. And no coding needed!
Now we only need to define some views, an approval workflow, use some customized CQWP's to ensure a nice layout and we're all set!

Labels:
Sharepoint
Abonneren op:
Posts (Atom)

