Add Domain account to local Administrators group

One lesson learned from the Ignite sessions is that in the future release of SharePoint PowerShell is the way to go for SharePoint admins. Hundreds of commands are available to do any kind of manipulation of your server farm. Looking at the “blue screen of death” has never really encouraged me to get my hands dirty. Time to be brave and follow Todd Klindt’s advice…force yourself to do it!

I found this great installation script written in PowerShell by Garry Lapointe to script the installation of a MOSS 2007 portal. This got me thinking: I am installing SP 2010 on my virtual machines, so why not try to do the same and create a script for 2010?

I started out with a script to add a domain account to the local administrators group. Must say that after this work I start to like the flexibility. More to come!

###################################################################
# Name:            		ADUserToLocalGroup.ps1
# Creation Date:    	November 7, 2009
#
# Purpose:        		Add a domain user account to a local group
#
# Inputs:       		username: 		The name of the domain user to add
#						domain:			The domain of the user to add
#						groupName:		The name of the local group to add the user to
#						action:			add/remove
#						computerName:	the name of the computer to add the user to
#
# Usage:        		ADUserToLocalGroup.ps1 -username {username} -domain {domain} -groupName {groupname} 
#						-action {add/remove} [-computername {computername}]
#            			If no computerName is specified the local computer is used
#
# Acknowledgements:    	Portions of this script were originally posted on the
#            			following websites. A big thanks to the original authors!
#
#    	http://myitforum.com/cs2/blogs/yli628/archive/2007/08/30/powershell-script-to-add-remove-
#            a-domain-user-to-the-local-administrators-group-on-a-remote-machine.aspx
#    	http://keithhill.spaces.live.com/blog/cns!5A8D2641E0963A97!676.entry
#    	http://www.microsoft.com/technet/scriptcenter/resources/qanda/mar08/hey0311.mspx
#		http://weblogs.asp.net/adweigert/archive/2007/10/10/powershell-try-catch-finally-comes-to-life.aspx
#
##################################################################
param
(
	[string]$username = $(throw "The parameter -username is required."),
	[string]$domain = $(throw "The parameter -domain is required."),
	[string]$groupname = $(throw "The parameter -groupname is required."), 
	[string]$action = $(throw "The parameter -action is required."), 
	[string]$computername = "localhost"
)

#Try/catch/finally function for v1 compatibility - taken from Adam Weigert's site
function Try
{
    param
    (
        [ScriptBlock]$Command = $(throw "The parameter -Command is required."),
        [ScriptBlock]$Catch   = { throw $_ },
        [ScriptBlock]$Finally = {}
    )
    
    & {
		$local:ErrorActionPreference = "SilentlyContinue"

        trap
        {
            trap
            {
                & {
                    trap { throw $_ }
                    &$Finally
                }
                throw $_
            }
            $_ | & { &$Catch }
        }
        &$Command
    }
    & {
        trap { throw $_ }
        &$Finally
    }
}

#Set the computername
if($computerName -eq "localhost"){ 
	$computerName = gc env:computerName 
}

Try {
	$computer = [ADSI]("WinNT://" + $computername + ",computer")
	$Group = $computer.psbase.children.find($groupname)
	$members= $Group.psbase.invoke("Members") | %{$_.GetType().InvokeMember("Name", 'GetProperty', $null, $_, $null)}
	
	if(($action -eq "Add") -AND ($members -contains $username)) {
		"The domain account specified (" + $username + ") is already a member of the local group (" + $groupname + "). No action taken."
		break
	} elseif (($action -eq "Remove") -and ($members -notcontains $username)){
		"The domain account specified (" + $username + ") is not a member of the group (" + $groupname + "). No action taken."
		break
	}
	
	if ($action.ToLower() -eq "add"){
		$Group.Add("WinNT://" + $domain + "/" + $username)
		"User '" + $username + "' has been succesfully added to the group '" + $groupname + "'"
	} elseif ($action.ToLower() -eq "remove"){
		$Group.Remove("WinNT://" + $domain + "/" + $username)
		"User '" + $username + "' has been succesfully removed from the group '" + $groupname + "'"
	} else { 
		"No or wrong action was specified, no action was taken." 
	}
} -Catch {
	"Exception occured in ADUserToLocalGroup: " + $_.Exception.Message
	"Parameters:"
	" 		- username: 	" + $username 
	" 		- domain: 		" + $domain 
	" 		- groupName:	" + $groupname
	"		- action: 		" + $action
	"		- computername: " + $computername
	throw $_
}

SharePoint 2010 Ignite - Amsterdam

Just came back from the SharePoint 2010 Ignite course in Amsterdam. Together with 150 SharePoint experts I had the chance to discover all the new features in the upcoming SharePoint 2010 release. It has been an interesting experience to see how the product is evolving to a much more mature application. Some quick random highlights:

  • The architecture has changed a lot to allow a much more scalable and manageable topology. I think the disappearance of the SSP is one of the biggest changes in the product. Instead we now get a whole list of pluggable service applications. But there are a lot of other huge changes which will make our life a lot simpler: extended logging, multiple databases instead of storing everything in the content database, restoring content by using detached databases, sandboxing, …
  • A lot of the problems in SP2007 have been solved. Commonly required features have been introduced. I think of the more mature ECM features (including taxonomies, tagging, rating, publishing of content types, document ID generation, document sets, document linking, …), WCM improvements (introduction of the ribbon, introduction of wiki's), …
  • The UX improvements definitely will make this product easier to use.
  • One major improvement is the BCS, formerly known as the Business Data Catalog. It has never been easier to import external content into SharePoint lists.
  • Search...I'm sure you'll be amazed by FAST search. Visual result sets, deep refiners, contextual search, phonetic search, lemmatization, … search as it should be.
  • Social improvements: I'm not convinced by the value of the social aspects introduced in this version. However, search based on social distance will most certainly improve the results even more. Mixed feelings about this.
  • Excel services and the REST services: certainly something to look in to
  • Powershell administration: I forgot the number, but more cmdlets than you can ever remember exist. Nothing you can't do in PowerShell.

I can go on like this for hours. Time to get my hands on this and start to play with it…got the SharePoint bug J

More to come.


Exciting times

Starting from this week everybody should prepare for a blog-tsunami because SharePoint 2010 has arrived! It looks like Xmas is a little early this year: lot's of goodies and new resources are being published, the long awaited SharePoint Conference is taking place and many enthousiastic geeks have had to wait too long to start blogging on what they discovered in the latest release of SharePoint.

For those of you interested, here is a list of interesting resources:

Secure communication between .NET and PHP

Lately I used the Rijndael algorithm to setup a single sign-on between our public facing SharePoint site (.NET) and an internet site (PHP). Rijndael is a symmetric encryption algorithm which means that the same key is used to encrypt and decrypt a message.

This algorithm is readily available in PHP as well as in .NET so in theory implementing the secure communication channel would be as simple as using the out-of-the-box functions. As it turned out...the real world proved to be a little more complex.

Both languages use different initialization settings so a simple encrypt-decrypt between both languages turns out to be not working.

First of all the Rijndael algorithm inherits from the SymmetricAlgorithm. The classes that derive from the SymmetricAlgorithm class use a chaining mode called cipher block chaining (CBC), which requires a key and an initialization vector (IV) to perform cryptographic transformations on data. To decrypt data that was encrypted using one of the SymmetricAlgorithm classes, you must set the Key property and IV property to the same values that were used for encryption.

Secondly most plain text messages do not consist of a number of bytes that completely fill blocks. Often, there are not enough bytes to fill the last block. When this happens, a padding string is added to the text. For example, if the block length is 64 bits and the last block contains only 40 bits, 24 bits of padding are added. For the communication to work, set the PaddingMode to Zeros.

And last but not least, I used MD5 to hash the key used for the encryption. It turns out that the implementation of this algorithm is different for both languages. PHP returns a character string of 32 characters. C# returns a 16 byte binary array. To produce a php-like md5 hash I used the following code:

public static string MD5(string password) {
   byte[] textBytes = System.Text.Encoding.Default.GetBytes(password);
   try {
      System.Security.Cryptography.MD5CryptoServiceProvider cryptHandler;
      cryptHandler = new System.Security.Cryptography.MD5CryptoServiceProvider();
      byte[] hash = cryptHandler.ComputeHash (textBytes);
      string ret = "";
      foreach (byte a in hash) {
         ret += a.ToString ("x2");
      }
      return ret ;
   }
   catch {
      throw;
   }
To test all this I created a little project.The project contains a .NET webservice with to methods: TestSymmetricDecryption and TestSymmetricEncryption. When the TestSymmetricEncryption is called, it encrypts a test message and sends the result. The TestSymmetricDecryption decrypts a message send to the service and returns the decrypted result. Secondly I've got a php page that calls both webservices and shows the result. c#:
using System;
using System.Collections;
using System.ComponentModel;
using System.Data;

using System.Web;
using System.Web.Services;
using System.Web.Services.Protocols;

using System.IO;
using System.Text;
using System.Security.Cryptography;

namespace VNTG.Rijndael.POC
{
    /// 
    /// Summary description for Rijndael
    /// 
    [WebService(Namespace = "http://tempuri.org/")]
    [WebServiceBinding(ConformsTo = WsiProfiles.BasicProfile1_1)]
    [ToolboxItem(false)]
    // To allow this Web Service to be called from script, using ASP.NET AJAX, uncomment the following line. 
    // [System.Web.Script.Services.ScriptService]
    public class RijndaelPOC : System.Web.Services.WebService
    {
        string key = "secret";        // can be any string
        string iv = "ujkrtadxcfrzpj1Bs5fpM18doZQDGYS4"; 
        System.Security.Cryptography.Rijndael r = null;

        [WebMethod]
        public string TestSymmetricEncryption()
        {
            InitializeRijndael();
            return Encrypt("This is a test");
        }

        [WebMethod]
        public string TestSymmetricDecryption(string message)
        {
            InitializeRijndael();
            return Decrypt(message);
        }

        private void InitializeRijndael()
        {
            byte[] keyBytes = Encoding.ASCII.GetBytes(EncodeTo64(key));
            byte[] hash = MD5.Create().ComputeHash(keyBytes);
            string ret = "";
            foreach (byte a in hash)
            {
                ret += a.ToString("x2");
            }
            string iv64 = EncodeTo64(iv);
            byte[] ivBytes = Convert.FromBase64String(iv64);
            
            r = System.Security.Cryptography.Rijndael.Create();
            
            r.Padding = PaddingMode.Zeros;
            r.BlockSize = 256;
            r.Key = Encoding.ASCII.GetBytes(ret);
            r.IV = ivBytes;

        }

        public string Decrypt(string str)
        {
            byte[] encryptedBytes = Convert.FromBase64String(str);
            byte[] decryptedBytes = transformBytes(
                r.CreateDecryptor(), encryptedBytes);

            string plaintext = Encoding.ASCII.GetString(decryptedBytes);
            int idx = plaintext.IndexOf("\0");
            if (idx > -1)
                plaintext = plaintext.Substring(0, idx);

            return plaintext;
        }

        public string Encrypt(string plaintext)
        {
            byte[] plainBytes = Encoding.ASCII.GetBytes(plaintext);
            byte[] encryptedBytes = transformBytes(
                r.CreateEncryptor(), plainBytes);

            return Convert.ToBase64String(encryptedBytes);
        }

        private byte[] transformBytes(ICryptoTransform transform,
            byte[] plainBytes)
        {
            MemoryStream memStream = new MemoryStream();
            CryptoStream cryptStream =
                new CryptoStream(memStream, transform,
                CryptoStreamMode.Write);
            cryptStream.Write(plainBytes, 0, plainBytes.Length);
            cryptStream.Close();
            byte[] encryptedBytes = memStream.ToArray();
            memStream.Close();

            return encryptedBytes;
        }

        private string EncodeTo64(string toEncode)
        {
            byte[] toEncodeAsBytes = System.Text.ASCIIEncoding.ASCII.GetBytes(toEncode);
            string returnValue = System.Convert.ToBase64String(toEncodeAsBytes);

            return returnValue;

        }
    }
}

PHP:
<?php
// include soap helper library
require_once('nusoap.php');

//initialize Rijndael settings
$key = 'secret';
$iv='ujkrtadxcfrzpj1Bs5fpM18doZQDGYS4';  //must be 32 chars long

function init_rijndael ($key,$iv) {
 $td = mcrypt_module_open('rijndael-256', '', 'cbc', '');
 if ($td !== FALSE)
 {
   $expected_key_size = mcrypt_enc_get_key_size($td);
  
   $key = substr(md5(base64_encode($key)), 0, $expected_key_size);
   
   mcrypt_generic_init($td, $key, $iv);
 }
 return $td;
}


//initialize proxy port
$proxyhost = isset($_POST['proxyhost']) ? $_POST['proxyhost'] : '';
$proxyport = isset($_POST['proxyport']) ? $_POST['proxyport'] : '';
$proxyusername = isset($_POST['proxyusername']) ? $_POST['proxyusername'] : '';
$proxypassword = isset($_POST['proxypassword']) ? $_POST['proxypassword'] : '';

//initialize webservice client
$client = new nusoap_client('http://localhost:1956/RijndaelPOC.asmx?WSDL', 'wsdl',
      $proxyhost, $proxyport, $proxyusername, $proxypassword);
$err = $client->getError();
if ($err) {
 echo '<h2>Constructor error</h2><pre>' . $err . '</pre>';
}

//PART 1: Encrypting on php side and retrieving result on .NET side

$td = init_rijndael($key,$iv);
$param = array('message' => base64_encode(mcrypt_generic($td, 'Dit is een test')));


// Call to webservice
$decryptedResult = $client->call('TestSymmetricDecryption', array('parameters' => $param));

if ($client->fault) {
 echo '<h2>Error has occured.</h2>';
} else {
 $err = $client->getError();
 if ($err) {
  echo '<h2>Error has occured.</h2>';
 }
}

//PART 2: Retrieving an encrypted message on .NET side and decrypting it on php side
$td = init_rijndael($key,$iv);
$encryptedResult = $client->call('TestSymmetricEncryption');

if ($client->fault) {
 echo '<h2>Error has occured.</h2>';
} else {
 $err = $client->getError();
 if ($err) {
  echo '<h2>Error has occured.</h2>';
 }
}

//decrypt encryptedResult
$encryptedResult = mdecrypt_generic($td, base64_decode($encryptedResult['TestSymmetricEncryptionResult']));

?>

<html>
 <head> 
  <title>Rijndael POC</title>
 </head>
 <body>
  <table>
   <tr>
    <td>Decrypted message on .NET: <?php print "'".$decryptedResult['TestSymmetricDecryptionResult']."'" ?></td>
   </tr>
   <tr>
    <td>Encrypted message on php: <?php print "'".$encryptedResult."'" ?></td>
   </tr>
  </table>
 </body>
</html>

Couldn't have done it without these posts:

ForwardLinks, Variations & user rights

Recently Tom, a colleague of mine, experienced some odd behavior using the ForwardLinks property of an SPListItem. We wanted to extend the out-of-the-box publishing features with some extra functionality using the forward links property, but ended up parsing rich text fields ourselves because of the non-expected behavior.

First of all, the ForwardLinks property should "Get a collection of hyperlinks that are associated with the item; for example, the hyperlinks in a URL Field or rich text field". So when we create a publishing page that contains links to some documents, the ForwardLinks property should be updated to contain these links. In the following scenario's we found that this is not the case.

Scenario 1

  • You create a page in /enu (variation source), with a link Link1 in the Rich Text field
  • You publish the page in /enu
  • The timer service propagates the page to the variations, creating a draft in all the target variations
  • ForwardLinks of all target variations correctly report the link Link1.
  • You publish the page in the target variations
  • You add another link Link2 in /enu
  • When querying the ForwardLinks as the app-pool acc, this link does not show up (the red marked I. in the schema)
  • You publish the page in /enu and wait for the propagation service
  • ForwardLinks is properly updated in /enu
  • ForwardLinks is not updated in the variation targets when querying as a sitecoll admin
  • ForwardLinks is updated when querying as app-pool acc
  • You check out the page in the target variations
  • You edit the rich text field in the target variations
  • You check in the page in the target variations
  • You publish the page in the target variations
  • ForwardLinks is properly updated in the target variations

Scenario 2

This is actually a variation on scenario 1, only this time we don't modify the variation source, only the variation targets

  • You create a page in /enu (variation source), with a link Link1 in the Rich Text field
  • You publish the page in /enu
  • The timer service propagates the page to the variations, creating a draft in all the target variations
  • ForwardLinks of all target variations correctly report the link Link1.
  • You publish the page in a variation target
  • While logged in as the site-admin, you edit a variation target and you add a new link Link2.
  • You check this variation target in as a new minor version
  • In this case, ForwardLinks queried as the site-admin returns the proper links. However, querying it as an app-pool account results in the wrong links (also see the red marked III. in the schema)
  • While logged in as the site-admin, publish the variation target
  • ForwardLinks returns the correct links for both site-admin as app-pool acc

In this case, querying ForwardLinks as the app-pool account returns the exact opposite of what was originally said: it returns the value of the latest published version instead of the latest draft version.

Scenario 3

Almost identical to scenario 2.

  • Execute step 1-5 of scenario2.
  • This time, log in as a user who's a member of the Designers group (not a sitecoll-admin). Edit a variation target and add a link Link2 in the rich-text field.
  • While logged in as a Designer user, do a check-in of the page (minor version)
  • When querying ForwardLinks as the sitecoll-admin or as app-pool, you only get a reference to Link1. Only when querying the property as the Designer-account, you get a proper reference to Link1 and Link2
  • Log back in as the sitecoll-admin and publish the page in the variation target-site
  • ForwardLinks property properly lists Link1 and Link2 for every user.

Conclusion

Querying ForwardLinks as the application-pool account does not always return the values of the latest draft version.

Furthermore, it looks like the values are totally random. Is there some documentation that describes the logic behind this property: in which case will it return a draft-version's links, in which case will it resort to the published version?

Fyi, we tried the following solutions to get the draft version... but they didn't work, since everyone of them conflicted with at least 1 scenario:

  • Query the ForwardLinks as the same user who's specified in ModifiedBy. this conflicts with our findings in scenario1, mark II. (the red rectangle)

If we're in a variation source, query ForwardLinks as the current-user, otherwise use the app-pool acc. this conflicts with scenario2, mark III and scenario3, mark IV

Nintex Workflow vs. Visio 2010

With the new Visio workflow creation tool in the Office clients a lot of questions popped to our minds about the need of a custom workflow creation tool as Nintex offers:

The promise is that with the new office clients you'll be able to create new workflows. This would be a fantastic extension for end-users to create their own workflows...however...there's a small catch:
The Visio toolkit will just be extended with SharePoint workflow tasks, so you'll be able to design a workflow, but not to configure it. After you have drawn your workflow design and validated it, you can import the XOML into SharePoint Designer and start doing the actual configuration and deployment.

So will there be a need for clients to have a third party workflow tool? As far as we know now, yes.
First of all having these workflow tools in your browser window is quite a nice feature. No clients needed.
Secondly the deployment is all browser-based, nice and easy. Whereas with the foreseen Visio extensions it would still require multiple client-side steps.

The new Visio extensions look promising, but Nintex still offers a lot of functionalities that I don't see happening with the new workflow support in Visio.

Mike Fitzmaurice (Vice President of Nintex) opened a blog on this topic to answer to some rumours.
If you want to learn about the Visio workflow design capabilities, there is a very good post by Wictor Wilén.

To be continued...

Creating custom listitem menu’s (ECB)

This week I was working on a custom packaging solution for Look And Feel. A colleague of mine needed to add menu items to the List Item menu's of the Style library, the masterpage library and the site collection images. Our first thought was to use CustomActions in a feature to implement this, but soon we found some problems:

Register only on the specified libraries

First of all it is impossible to define a custom action only for the lists that we needed. The RegistrationID property of the CustomAction element gives some form of control, but not as specific as we needed. For more info on Custom Actions see the following articles:

Rights parameter insufficient

Secondly we needed to only show the menu when a user was part of a certain group. CustomActions allow you to specify the rights the user must have in order to see a certain menu-item. Again this was of no value to us because there were several groups with the same rights, but we only wanted the menu-items for a certain group.

ControlAssembly not allowed on Listitem ECB

Our last attempt was to write a custom control that renders the menu-item. If we were able to create a server-side control that could check whether we were on the right list and find out about the user roles…we were off to go…but after some reading we found out that the ControlAssembly option is not available for listitem menu's (see Jan Tielen's blog) since the menu is rendered entirely by javascript.

Solution

I started looking at the core.js (/_layouts/1033/core.js) which contains the menu code and found the functions & mechanisms to create menu items. If you click on a menu-item the menu is rendered by the CreateMenuEx function. This function basically calls several other functions which are all responsible for a subset of menu-items. One of these functions is AddDocLibMenuItems (m,ctx). The AddDocLibMenuItems function takes two parameters. The first parameter, called m, represents the menu object itself; the second parameter, ctx, provides HTTP context information about the web request. I didn't want to edit the core.js file since it is a system file, so I came up with the following solution:

//Store reference to original function
var original_AddDocLibMenuItems = AddDocLibMenuItems;

//Override the original function
AddDocLibMenuItems = function(m,ctx) {
 strDisplayText="Test";
 strAction="alert('ok')";
 strImagePath="";
  
 CAMOpt(m, strDisplayText, strAction, strImagePath);
 CAMSep(m);
  
 //Call the original function
 original_AddDocLibMenuItems(m,ctx);
}

The code is inserted on the listview form pages of the Style library, the masterpage library and the site collection images using a content editor webpart. What it does is override the AddDocLibMenuItems function and assign the original function to a variable. This is necessary to be able to call the original function once we injected our own code. Using this mechanism there is no need to make changes to the core.js file!

Adding a menu item to the menu requires just one function call:

CAMOpt(m, strDisplayText, strAction, strImagePath);

The CAMOpt function takes four parameters: the menu object to add the new item to, the display text of the menu item, the javascript action to perform when the item is clicked and a path to an image file to associate with the item. A call to the CAMSep function adds the separator bar to the menu. Both these functions are defined in the menu.js file on the SharePoint server.

Now if you know all about the wonderful SPAPI libraries to use the SharePoint webservices in javascript, then you know you might implement whatever you want and create advanced menuitems. My complete solution:

<script type="text/javascript" src="/_layouts/js/jquery-1.3.2.min.js"></script>
<script type="text/javascript" src="/_layouts/js/SPAPI_Core.js"></script>
<script type="text/javascript" src="/_layouts/js/SPAPI_Lists.js"></script>
<script type="text/javascript" src="/_layouts/js/SPAPI_UserGroup.js"></script>
<script type="text/javascript" src="/_layouts/js/SPAPI_UserProfile.js"></script>

<script type="text/javascript">
$(document).ready(function () {
 var userName = getCurrentUserName();
   if (userName != null){
        var accountName = getAccountName(userName);
        if(accountName != null) {
          if(isMemberOfGroup(accountName,"Blog - Test site Members")) {
    showLink();
   }
        }
      
     }   
});


//Helper functions
function showLink() {
 //Store reference to original function
 var original_AddDocLibMenuItems = AddDocLibMenuItems;

 //Override the original function
 AddDocLibMenuItems = function(m,ctx) {
    strDisplayText="Test";
    strAction="alert('ok')";
    strImagePath="";
  
    CAMOpt(m, strDisplayText, strAction, strImagePath);
    CAMSep(m);
  
    //Call the original function
    original_AddDocLibMenuItems(m,ctx);
 }
}

function isMemberOfGroup(accountName,groupName) {
   var usergroup = new SPAPI_UserGroup('http://moss/sites/blog');
        var items = usergroup.getGroupCollectionFromUser(accountName);
    
        if(items.status == 200)
 {
  if($(items.responseXML).find("Group[Name='" + groupName + "']").size() > 0)
  {
   return true;
  } 
  else 
  {
   return false;
  }
        } else {
  return false;
 }
        
}

function getAccountName(userName)
{
     var profile = new SPAPI_UserProfile('http://moss/sites/blog')
     var p = profile.getUserProfileByName(userName);

     if (p.status == 200)
     {
         var properties = p.responseXML.getElementsByTagName('PropertyData');
        var propertyValues = new Array();

        for (var i=0; i < properties.length; i++)
        {
          var propName = properties[i].getElementsByTagName('Name')[0].childNodes[0].nodeValue;
          propertyValues[propName] = properties[i].getElementsByTagName('Value');
        }
        return propertyValues['AccountName'][0].childNodes[0].nodeValue;
  
     }
     else
     {
         return null;
     }
}


function getCurrentUserName()
{
    var lists = new SPAPI_Lists('http://moss/sites/blog')
    var items = lists.getListItems(
    'User Information List',
    '',
    '<Query><Where><Eq><FieldRef Name="ID"/><Value Type="Counter">' + _spUserId + '</Value></Eq></Where></Query>',  // query
    '<ViewFields><FieldRef Name="Name"/></ViewFields>',
    1,  // rowLimit
    ''  // queryOptions
    );
    
    if (items.status == 200)
    {
        var rows = items.responseXML.getElementsByTagName('z:row');
        if (rows.length == 1)
        {
            return rows[0].getAttribute('ows_Name');
        }
        else
        {
            return null;
        }
    }
    else
    {
        return null;
    }
} 
</script>

To create an easy deployable solution you might want to opt to insert this code through a delegate control and just perform some additional checks on the location. I know this is not the most beautiful solution, but based on the design of these menus I can't think of a better way to implement this. Of course, all suggestions are more than welcome!

Cascading fields solution using jQuery – PART 1

Many of my clients require cascading fields in SharePoint lists. The most common solution to this problem is creating a custom field that implements the desired functionality. In this series however, I will try to create the cascading fields using a combination of the out-of-the-box SharePoint fields, the jQuery library, SPAPI and SharePoint webservices. In this first part we'll create the supporting lists and add some functionality that allows easy input for the end-user. In part 2 I'll go deeper into creating the cascading field.

1. Requirements

Suppose our end-user wants to have the following features:

  1. See all cities that are related to a certain country on the display form of the country
  2. Have a link to insert cities for a certain country

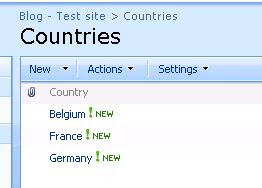
The picture shows how our solution could look like. Notice the column Cities in the Display form of a Country. This additional column is inserted through our solution. It lists all cities that are related to the current country. At the bottom of the list you find a link that allows the user to add additional cities for the current country. The link takes you to the New form of the cities list. The lookup field in that list should already point to the country.

2. Lists

For this tutorial we create two custom lists: 'Countries' and 'Cities'. The Country list only has one field of type single text named Country.

The Cities list contains two fields:

  • City- single line of text
  • Country - lookup field to Country list

3. Libraries

Since this tutorial is all about the usage of jQuery in combination with out-of-the-box SharePoint we'll make live a little easier and use some excellent libraries that exist for the tasks that we need to perform.

AJAX calls to SharePoint webservices:

The list of related cities will be retrieved by an AJAX call to the SharePoint web services. Writing the SOAP envelop is somewhat of a tedious task so we'll use the great javascript library written by Darren Johnstone that simplifies the code to connect to the SharePoint webservices. More information can be found here.

Populate fields on forms using jQuery:

Not so long ago I discovered a great library (reading another excellent blog post of the Paul Grenier ' jQuery for everyone' series) that makes your SharePoint forms look at the querystring and automatically populate the corresponding fields. This is just what we need to automatically fill in the lookup field that points to the country. The library itself can be found on Codeplex.

4. Preparing the environment

First we need to add the jQuery library to our SharePoint pages (see Jan Tielen's blog if you don't know how) to be able to write some powerful javascript. I usually go for the delegate control variant because it allows to insert jQuery for a complete site by activating a feature. To include the other three libraries where needed, we'll put a Content Editor webpart on the forms page. Since you cannot edit the SharePoint forms pages in the browser, you need to apply a little trick: Open the form (for example the EditForm.aspx of the cities list) and append to the querystring PageView=Shared&ToolPaneView=2 (more info can be found here). You'll be able to add a Content Editor webpart and add a link to the desired library as follows:

<script type="text/javascript" src="_layouts/js/SPAPI_Lists.js"></script>

For now just leave as is, once we setup the solution I will link the correct libraries at the correct places.

5. Creating the solution

Adding the Cities to the DisplayForm

To add the list of cities to the displayform of a country open the DisplayForm for one country and add the PageView=Shared&ToolPaneView=2 to the querystring. This should allow you to add a content editor webpart on the form. Inside the content editor webpart we need to link to the SPAPI libraries (SPAPI_Core.js & SPAPI_Lists.js) to do the AJAX calls. I placed these libraries into the Layouts folder of the 12 hive so we insert the following links:

<script type="text/javascript" src="http://moss/sites/blog/_layouts/js/SPAPI_Lists.js"></script>
<script type="text/javascript" src="http://moss/sites/blog/_layouts/js/SPAPI_Core.js"></script>

Since jQuery is available we're going to use this library to add an additional row to form. The HTML code for this row should be something like this:

<tr>
 <td class='ms-formlabel' nowrap='true' valign='top'>
  <h3 class='ms-standardheader'>Cities</h3>
 </td>
 <td id='SPFieldText' class='ms-formbody' valign='top'> 
  [List of Related Cities]
  [Link to New City form]
 </td>
</tr>

So to add it to the table we insert the following code:

$(".ms-formtable tbody").append("<tr><td class='ms-formlabel' nowrap='true' valign='top'><h3 class='ms-standardheader'>Cities</h3></td><td id='SPFieldText' class='ms-formbody' valign='top'> <ul id='citiesUl'></ul><a href=''>Add new city</a></td></tr>");

Now to find the cities and place them in this row, we first need to find the ID of the current Item to query the cities list. The ID is in the querystring so I insert the following code to read out that value and store it in a variable:

function getUrlParam(name){  
 name = name.replace(/[\[]/,"\\\[").replace(/[\]]/,"\\\]");  
 var regexS = "[\\?&]"+name+"=([^&#]*)";  
 var regex = new RegExp( regexS );  
 var results = regex.exec( window.location.href );  
 if( results == null )    
  return "";  
 else 
  return results[1];
}

var id = getUrlParam("ID");

Now we can create a CAML query to find all cities that are related to the current country:

<Query>
 <Where>
  <Eq>
   <FieldRef Name="Country" LookupId="true"/>
   <Value Type="Lookup">[ID]</Value>
  </Eq>
 </Where>
</Query>

Great, all that is left to do is write an AJAX call to the _vti_bin/Lists.asmx webservice and display those items in the form. The SPAPI library allows to query lists with the following code (more examples can be found here):

var lists = new SPAPI_Lists('http://moss/sites/blog');
var items = lists.getListItems(
 'Cities',   // listName
 '',         // viewname
 '<Query><Where><Eq><FieldRef Name="Country" LookupId="true"/><Value Type="Lookup">' + id + '</Value></Eq></Where></Query>',  // query
 '<ViewFields><FieldRef Name="Title"/></ViewFields>',  // viewFields
 100,    // rowLimit
 '<QueryOptions><IncludeMandatoryColumns>FALSE</IncludeMandatoryColumns></QueryOptions>'  // queryOptions
);
  
if (items.status == 200) {
 // do something with the response
}
else {
 alert('There was an error: ' + items.statusText);
}

Now we add some processing of the XML to the code (don't you love jQuery!) and combine all together to:

<script type="text/javascript" src="http://moss/sites/blog/_layouts/js/SPAPI_Lists.js"></script>
<script type="text/javascript" src="http://moss/sites/blog/_layouts/js/SPAPI_Core.js"></script>


<script type="text/javascript">
 function getUrlParam(name){  
  name = name.replace(/[\[]/,"\\\[").replace(/[\]]/,"\\\]");  
  var regexS = "[\\?&]"+name+"=([^&#]*)";  
  var regex = new RegExp( regexS );  
  var results = regex.exec( window.location.href );  
  if( results == null )    
   return "";  
  else 
   return results[1];
 }
 
 $(function() {
  var id = getUrlParam("ID");
  var lists = new SPAPI_Lists('http://moss/sites/blog');
  var items = lists.getListItems(
   'Cities',   // listName
   '',         // viewname
   '<Query><Where><Eq><FieldRef Name="Country" LookupId="true"/><Value Type="Lookup">' + id + '</Value></Eq></Where></Query>',  // query
   '<ViewFields><FieldRef Name="Title"/></ViewFields>',  // viewFields
   5,    // rowLimit
   '<QueryOptions><IncludeMandatoryColumns>FALSE</IncludeMandatoryColumns></QueryOptions>'  // queryOptions
  );

  
  if (items.status == 200) {
   var cities ='';
   $(items.responseXML).find("z\\:row").each(function() {
    var liHtml = "<li>" + $(this).attr("ows_Title") + "</li>";
    cities += liHtml;
    //$(cities).append(liHtml);
   });
   $(".ms-formtable tbody").append("<tr><td class='ms-formlabel' nowrap='true' valign='top'><h3 class='ms-standardheader'>Cities</h3></td><td id='SPFieldText' class='ms-formbody' valign='top'> <ul id='citiesUl'>" + cities + "</ul><a href=''>Add new city</a></td></tr>");  
  }
  else {
   alert('There was an error: ' + items.statusText);
  }
 });
</script>

Creating a prepopulated field

Let's start out by creating a link to the new item form of the cities list that includes a value to prepopulate a field on the form. Since we are using the SPFF library the querystring just needs to be extended with [fieldname]=[value]. In this case the fieldname is 'Country' and the value is the ID of the current country. We already have the ID of the current country in a variable so all we have to do is create a link. Replace the link in the previous code by the following:

<a href='../Cities/NewForm.aspx?Country=" + id + "&Source=" + escape(window.location.href) + "'>Add new city</a>

So it becomes:

$(".ms-formtable tbody").append("<tr><td class='ms-formlabel' nowrap='true' valign='top'><h3 class='ms-standardheader'>Cities</h3></td><td id='SPFieldText' class='ms-formbody' valign='top'> <ul id='citiesUl'>" + cities + "</ul><a href='../Cities/NewForm.aspx?Country=" + id + "&Source=" + escape(window.location.href) + "'>Add new city</a></td></tr>");

The code for the content editor webpart on the display form of the Countries list is complete. Save it and watch the magic happen!

The last part of the solution is to include the SPFF library on the new item form of the cities list and activate the querystring processing (examples can be found here). Again, open the new form and add PageView=Shared&ToolPaneView=2 to the querystring. Add a Content Editor webpart and add the following code:

<script type="text/javascript" src="_layouts/js/spff.js"></script>

<script type="text/javascript">
 $(function(){
 $.spff({lock:true});
 });

</script> 

If everything went ok, you can now test this connection. Clicking on the link to add a city should prepopulate the lookup field:

In the next part we'll look at how the 2 lists can be used to create cascading fields. Stay tuned!