Creating custom listitem menu’s (ECB)

This week I was working on a custom packaging solution for Look And Feel. A colleague of mine needed to add menu items to the List Item menu's of the Style library, the masterpage library and the site collection images. Our first thought was to use CustomActions in a feature to implement this, but soon we found some problems:

Register only on the specified libraries

First of all it is impossible to define a custom action only for the lists that we needed. The RegistrationID property of the CustomAction element gives some form of control, but not as specific as we needed. For more info on Custom Actions see the following articles:

Rights parameter insufficient

Secondly we needed to only show the menu when a user was part of a certain group. CustomActions allow you to specify the rights the user must have in order to see a certain menu-item. Again this was of no value to us because there were several groups with the same rights, but we only wanted the menu-items for a certain group.

ControlAssembly not allowed on Listitem ECB

Our last attempt was to write a custom control that renders the menu-item. If we were able to create a server-side control that could check whether we were on the right list and find out about the user roles…we were off to go…but after some reading we found out that the ControlAssembly option is not available for listitem menu's (see Jan Tielen's blog) since the menu is rendered entirely by javascript.

Solution

I started looking at the core.js (/_layouts/1033/core.js) which contains the menu code and found the functions & mechanisms to create menu items. If you click on a menu-item the menu is rendered by the CreateMenuEx function. This function basically calls several other functions which are all responsible for a subset of menu-items. One of these functions is AddDocLibMenuItems (m,ctx). The AddDocLibMenuItems function takes two parameters. The first parameter, called m, represents the menu object itself; the second parameter, ctx, provides HTTP context information about the web request. I didn't want to edit the core.js file since it is a system file, so I came up with the following solution:

//Store reference to original function
var original_AddDocLibMenuItems = AddDocLibMenuItems;

//Override the original function
AddDocLibMenuItems = function(m,ctx) {
 strDisplayText="Test";
 strAction="alert('ok')";
 strImagePath="";
  
 CAMOpt(m, strDisplayText, strAction, strImagePath);
 CAMSep(m);
  
 //Call the original function
 original_AddDocLibMenuItems(m,ctx);
}

The code is inserted on the listview form pages of the Style library, the masterpage library and the site collection images using a content editor webpart. What it does is override the AddDocLibMenuItems function and assign the original function to a variable. This is necessary to be able to call the original function once we injected our own code. Using this mechanism there is no need to make changes to the core.js file!

Adding a menu item to the menu requires just one function call:

CAMOpt(m, strDisplayText, strAction, strImagePath);

The CAMOpt function takes four parameters: the menu object to add the new item to, the display text of the menu item, the javascript action to perform when the item is clicked and a path to an image file to associate with the item. A call to the CAMSep function adds the separator bar to the menu. Both these functions are defined in the menu.js file on the SharePoint server.

Now if you know all about the wonderful SPAPI libraries to use the SharePoint webservices in javascript, then you know you might implement whatever you want and create advanced menuitems. My complete solution:

<script type="text/javascript" src="/_layouts/js/jquery-1.3.2.min.js"></script>
<script type="text/javascript" src="/_layouts/js/SPAPI_Core.js"></script>
<script type="text/javascript" src="/_layouts/js/SPAPI_Lists.js"></script>
<script type="text/javascript" src="/_layouts/js/SPAPI_UserGroup.js"></script>
<script type="text/javascript" src="/_layouts/js/SPAPI_UserProfile.js"></script>

<script type="text/javascript">
$(document).ready(function () {
 var userName = getCurrentUserName();
   if (userName != null){
        var accountName = getAccountName(userName);
        if(accountName != null) {
          if(isMemberOfGroup(accountName,"Blog - Test site Members")) {
    showLink();
   }
        }
      
     }   
});


//Helper functions
function showLink() {
 //Store reference to original function
 var original_AddDocLibMenuItems = AddDocLibMenuItems;

 //Override the original function
 AddDocLibMenuItems = function(m,ctx) {
    strDisplayText="Test";
    strAction="alert('ok')";
    strImagePath="";
  
    CAMOpt(m, strDisplayText, strAction, strImagePath);
    CAMSep(m);
  
    //Call the original function
    original_AddDocLibMenuItems(m,ctx);
 }
}

function isMemberOfGroup(accountName,groupName) {
   var usergroup = new SPAPI_UserGroup('http://moss/sites/blog');
        var items = usergroup.getGroupCollectionFromUser(accountName);
    
        if(items.status == 200)
 {
  if($(items.responseXML).find("Group[Name='" + groupName + "']").size() > 0)
  {
   return true;
  } 
  else 
  {
   return false;
  }
        } else {
  return false;
 }
        
}

function getAccountName(userName)
{
     var profile = new SPAPI_UserProfile('http://moss/sites/blog')
     var p = profile.getUserProfileByName(userName);

     if (p.status == 200)
     {
         var properties = p.responseXML.getElementsByTagName('PropertyData');
        var propertyValues = new Array();

        for (var i=0; i < properties.length; i++)
        {
          var propName = properties[i].getElementsByTagName('Name')[0].childNodes[0].nodeValue;
          propertyValues[propName] = properties[i].getElementsByTagName('Value');
        }
        return propertyValues['AccountName'][0].childNodes[0].nodeValue;
  
     }
     else
     {
         return null;
     }
}


function getCurrentUserName()
{
    var lists = new SPAPI_Lists('http://moss/sites/blog')
    var items = lists.getListItems(
    'User Information List',
    '',
    '<Query><Where><Eq><FieldRef Name="ID"/><Value Type="Counter">' + _spUserId + '</Value></Eq></Where></Query>',  // query
    '<ViewFields><FieldRef Name="Name"/></ViewFields>',
    1,  // rowLimit
    ''  // queryOptions
    );
    
    if (items.status == 200)
    {
        var rows = items.responseXML.getElementsByTagName('z:row');
        if (rows.length == 1)
        {
            return rows[0].getAttribute('ows_Name');
        }
        else
        {
            return null;
        }
    }
    else
    {
        return null;
    }
} 
</script>

To create an easy deployable solution you might want to opt to insert this code through a delegate control and just perform some additional checks on the location. I know this is not the most beautiful solution, but based on the design of these menus I can't think of a better way to implement this. Of course, all suggestions are more than welcome!

Cascading fields solution using jQuery – PART 1

Many of my clients require cascading fields in SharePoint lists. The most common solution to this problem is creating a custom field that implements the desired functionality. In this series however, I will try to create the cascading fields using a combination of the out-of-the-box SharePoint fields, the jQuery library, SPAPI and SharePoint webservices. In this first part we'll create the supporting lists and add some functionality that allows easy input for the end-user. In part 2 I'll go deeper into creating the cascading field.

1. Requirements

Suppose our end-user wants to have the following features:

  1. See all cities that are related to a certain country on the display form of the country
  2. Have a link to insert cities for a certain country

The picture shows how our solution could look like. Notice the column Cities in the Display form of a Country. This additional column is inserted through our solution. It lists all cities that are related to the current country. At the bottom of the list you find a link that allows the user to add additional cities for the current country. The link takes you to the New form of the cities list. The lookup field in that list should already point to the country.

2. Lists

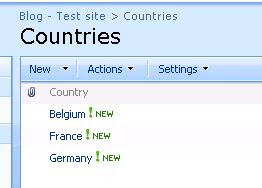
For this tutorial we create two custom lists: 'Countries' and 'Cities'. The Country list only has one field of type single text named Country.

The Cities list contains two fields:

  • City- single line of text
  • Country - lookup field to Country list

3. Libraries

Since this tutorial is all about the usage of jQuery in combination with out-of-the-box SharePoint we'll make live a little easier and use some excellent libraries that exist for the tasks that we need to perform.

AJAX calls to SharePoint webservices:

The list of related cities will be retrieved by an AJAX call to the SharePoint web services. Writing the SOAP envelop is somewhat of a tedious task so we'll use the great javascript library written by Darren Johnstone that simplifies the code to connect to the SharePoint webservices. More information can be found here.

Populate fields on forms using jQuery:

Not so long ago I discovered a great library (reading another excellent blog post of the Paul Grenier ' jQuery for everyone' series) that makes your SharePoint forms look at the querystring and automatically populate the corresponding fields. This is just what we need to automatically fill in the lookup field that points to the country. The library itself can be found on Codeplex.

4. Preparing the environment

First we need to add the jQuery library to our SharePoint pages (see Jan Tielen's blog if you don't know how) to be able to write some powerful javascript. I usually go for the delegate control variant because it allows to insert jQuery for a complete site by activating a feature. To include the other three libraries where needed, we'll put a Content Editor webpart on the forms page. Since you cannot edit the SharePoint forms pages in the browser, you need to apply a little trick: Open the form (for example the EditForm.aspx of the cities list) and append to the querystring PageView=Shared&ToolPaneView=2 (more info can be found here). You'll be able to add a Content Editor webpart and add a link to the desired library as follows:

<script type="text/javascript" src="_layouts/js/SPAPI_Lists.js"></script>

For now just leave as is, once we setup the solution I will link the correct libraries at the correct places.

5. Creating the solution

Adding the Cities to the DisplayForm

To add the list of cities to the displayform of a country open the DisplayForm for one country and add the PageView=Shared&ToolPaneView=2 to the querystring. This should allow you to add a content editor webpart on the form. Inside the content editor webpart we need to link to the SPAPI libraries (SPAPI_Core.js & SPAPI_Lists.js) to do the AJAX calls. I placed these libraries into the Layouts folder of the 12 hive so we insert the following links:

<script type="text/javascript" src="http://moss/sites/blog/_layouts/js/SPAPI_Lists.js"></script>
<script type="text/javascript" src="http://moss/sites/blog/_layouts/js/SPAPI_Core.js"></script>

Since jQuery is available we're going to use this library to add an additional row to form. The HTML code for this row should be something like this:

<tr>
 <td class='ms-formlabel' nowrap='true' valign='top'>
  <h3 class='ms-standardheader'>Cities</h3>
 </td>
 <td id='SPFieldText' class='ms-formbody' valign='top'> 
  [List of Related Cities]
  [Link to New City form]
 </td>
</tr>

So to add it to the table we insert the following code:

$(".ms-formtable tbody").append("<tr><td class='ms-formlabel' nowrap='true' valign='top'><h3 class='ms-standardheader'>Cities</h3></td><td id='SPFieldText' class='ms-formbody' valign='top'> <ul id='citiesUl'></ul><a href=''>Add new city</a></td></tr>");

Now to find the cities and place them in this row, we first need to find the ID of the current Item to query the cities list. The ID is in the querystring so I insert the following code to read out that value and store it in a variable:

function getUrlParam(name){  
 name = name.replace(/[\[]/,"\\\[").replace(/[\]]/,"\\\]");  
 var regexS = "[\\?&]"+name+"=([^&#]*)";  
 var regex = new RegExp( regexS );  
 var results = regex.exec( window.location.href );  
 if( results == null )    
  return "";  
 else 
  return results[1];
}

var id = getUrlParam("ID");

Now we can create a CAML query to find all cities that are related to the current country:

<Query>
 <Where>
  <Eq>
   <FieldRef Name="Country" LookupId="true"/>
   <Value Type="Lookup">[ID]</Value>
  </Eq>
 </Where>
</Query>

Great, all that is left to do is write an AJAX call to the _vti_bin/Lists.asmx webservice and display those items in the form. The SPAPI library allows to query lists with the following code (more examples can be found here):

var lists = new SPAPI_Lists('http://moss/sites/blog');
var items = lists.getListItems(
 'Cities',   // listName
 '',         // viewname
 '<Query><Where><Eq><FieldRef Name="Country" LookupId="true"/><Value Type="Lookup">' + id + '</Value></Eq></Where></Query>',  // query
 '<ViewFields><FieldRef Name="Title"/></ViewFields>',  // viewFields
 100,    // rowLimit
 '<QueryOptions><IncludeMandatoryColumns>FALSE</IncludeMandatoryColumns></QueryOptions>'  // queryOptions
);
  
if (items.status == 200) {
 // do something with the response
}
else {
 alert('There was an error: ' + items.statusText);
}

Now we add some processing of the XML to the code (don't you love jQuery!) and combine all together to:

<script type="text/javascript" src="http://moss/sites/blog/_layouts/js/SPAPI_Lists.js"></script>
<script type="text/javascript" src="http://moss/sites/blog/_layouts/js/SPAPI_Core.js"></script>


<script type="text/javascript">
 function getUrlParam(name){  
  name = name.replace(/[\[]/,"\\\[").replace(/[\]]/,"\\\]");  
  var regexS = "[\\?&]"+name+"=([^&#]*)";  
  var regex = new RegExp( regexS );  
  var results = regex.exec( window.location.href );  
  if( results == null )    
   return "";  
  else 
   return results[1];
 }
 
 $(function() {
  var id = getUrlParam("ID");
  var lists = new SPAPI_Lists('http://moss/sites/blog');
  var items = lists.getListItems(
   'Cities',   // listName
   '',         // viewname
   '<Query><Where><Eq><FieldRef Name="Country" LookupId="true"/><Value Type="Lookup">' + id + '</Value></Eq></Where></Query>',  // query
   '<ViewFields><FieldRef Name="Title"/></ViewFields>',  // viewFields
   5,    // rowLimit
   '<QueryOptions><IncludeMandatoryColumns>FALSE</IncludeMandatoryColumns></QueryOptions>'  // queryOptions
  );

  
  if (items.status == 200) {
   var cities ='';
   $(items.responseXML).find("z\\:row").each(function() {
    var liHtml = "<li>" + $(this).attr("ows_Title") + "</li>";
    cities += liHtml;
    //$(cities).append(liHtml);
   });
   $(".ms-formtable tbody").append("<tr><td class='ms-formlabel' nowrap='true' valign='top'><h3 class='ms-standardheader'>Cities</h3></td><td id='SPFieldText' class='ms-formbody' valign='top'> <ul id='citiesUl'>" + cities + "</ul><a href=''>Add new city</a></td></tr>");  
  }
  else {
   alert('There was an error: ' + items.statusText);
  }
 });
</script>

Creating a prepopulated field

Let's start out by creating a link to the new item form of the cities list that includes a value to prepopulate a field on the form. Since we are using the SPFF library the querystring just needs to be extended with [fieldname]=[value]. In this case the fieldname is 'Country' and the value is the ID of the current country. We already have the ID of the current country in a variable so all we have to do is create a link. Replace the link in the previous code by the following:

<a href='../Cities/NewForm.aspx?Country=" + id + "&Source=" + escape(window.location.href) + "'>Add new city</a>

So it becomes:

$(".ms-formtable tbody").append("<tr><td class='ms-formlabel' nowrap='true' valign='top'><h3 class='ms-standardheader'>Cities</h3></td><td id='SPFieldText' class='ms-formbody' valign='top'> <ul id='citiesUl'>" + cities + "</ul><a href='../Cities/NewForm.aspx?Country=" + id + "&Source=" + escape(window.location.href) + "'>Add new city</a></td></tr>");

The code for the content editor webpart on the display form of the Countries list is complete. Save it and watch the magic happen!

The last part of the solution is to include the SPFF library on the new item form of the cities list and activate the querystring processing (examples can be found here). Again, open the new form and add PageView=Shared&ToolPaneView=2 to the querystring. Add a Content Editor webpart and add the following code:

<script type="text/javascript" src="_layouts/js/spff.js"></script>

<script type="text/javascript">
 $(function(){
 $.spff({lock:true});
 });

</script> 

If everything went ok, you can now test this connection. Clicking on the link to add a city should prepopulate the lookup field:

In the next part we'll look at how the 2 lists can be used to create cascading fields. Stay tuned!